Templates
The Templates section in your Admin Dashboard provides a comprehensive interface for creating, managing, and maintaining reusable PDF templates. This feature enables you to build HTML layouts with Handlebars templating that can be populated with dynamic data through API calls.
Getting Started – Your First Template
When you first access the Templates section through the left sidebar in your Admin Dashboard, you'll see the getting started interface:
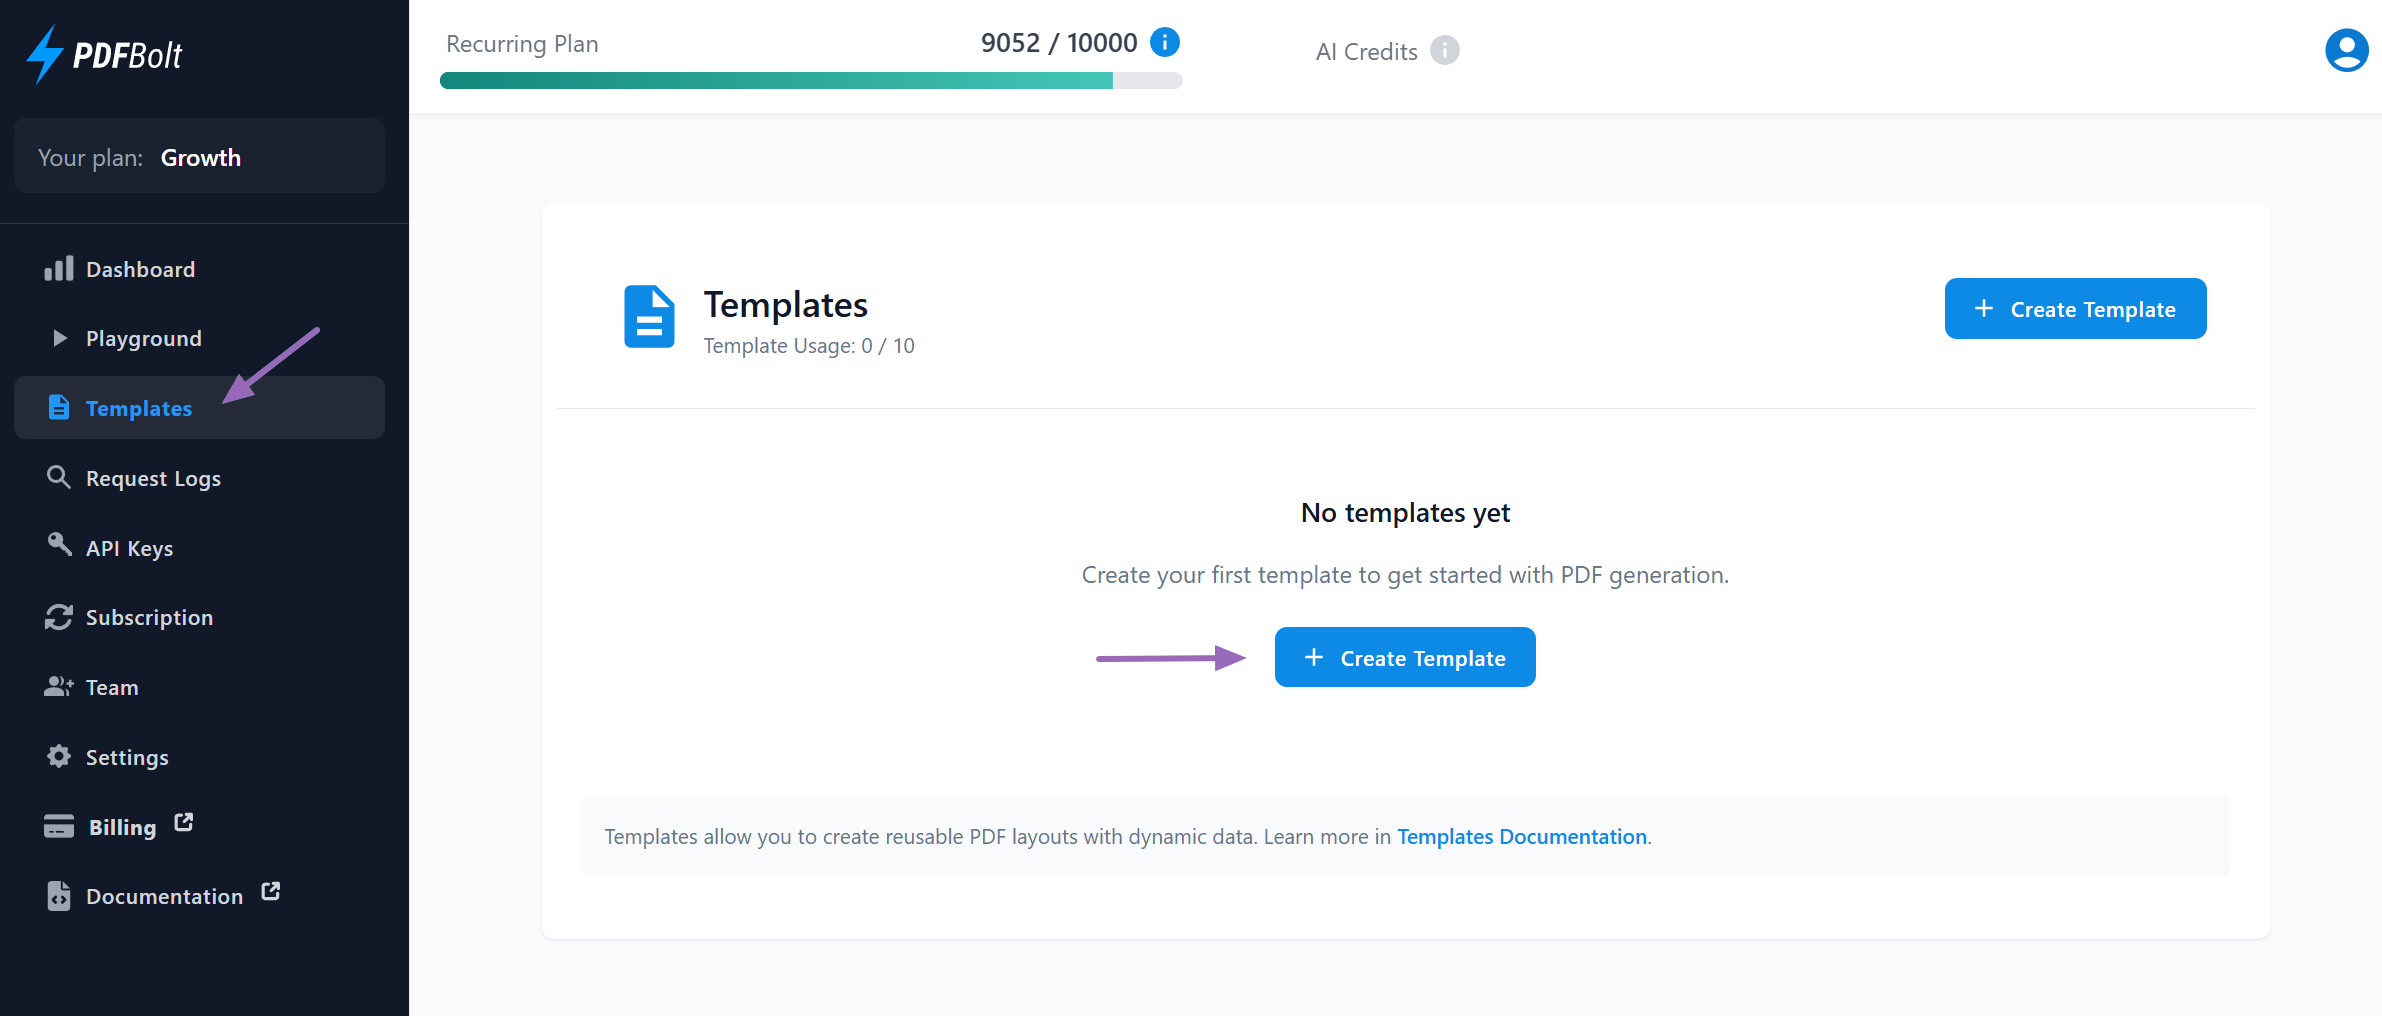
What you'll see:
- Template Usage Counter: Shows current usage against your plan limits (e.g., Template Usage: 0 / 10).
- Create Template Button: Your starting point for PDF template creation.
- Documentation Link: Quick access to template documentation.
Step 1: Creating Your First Template
Click the "Create Template" button to begin your template creation journey:
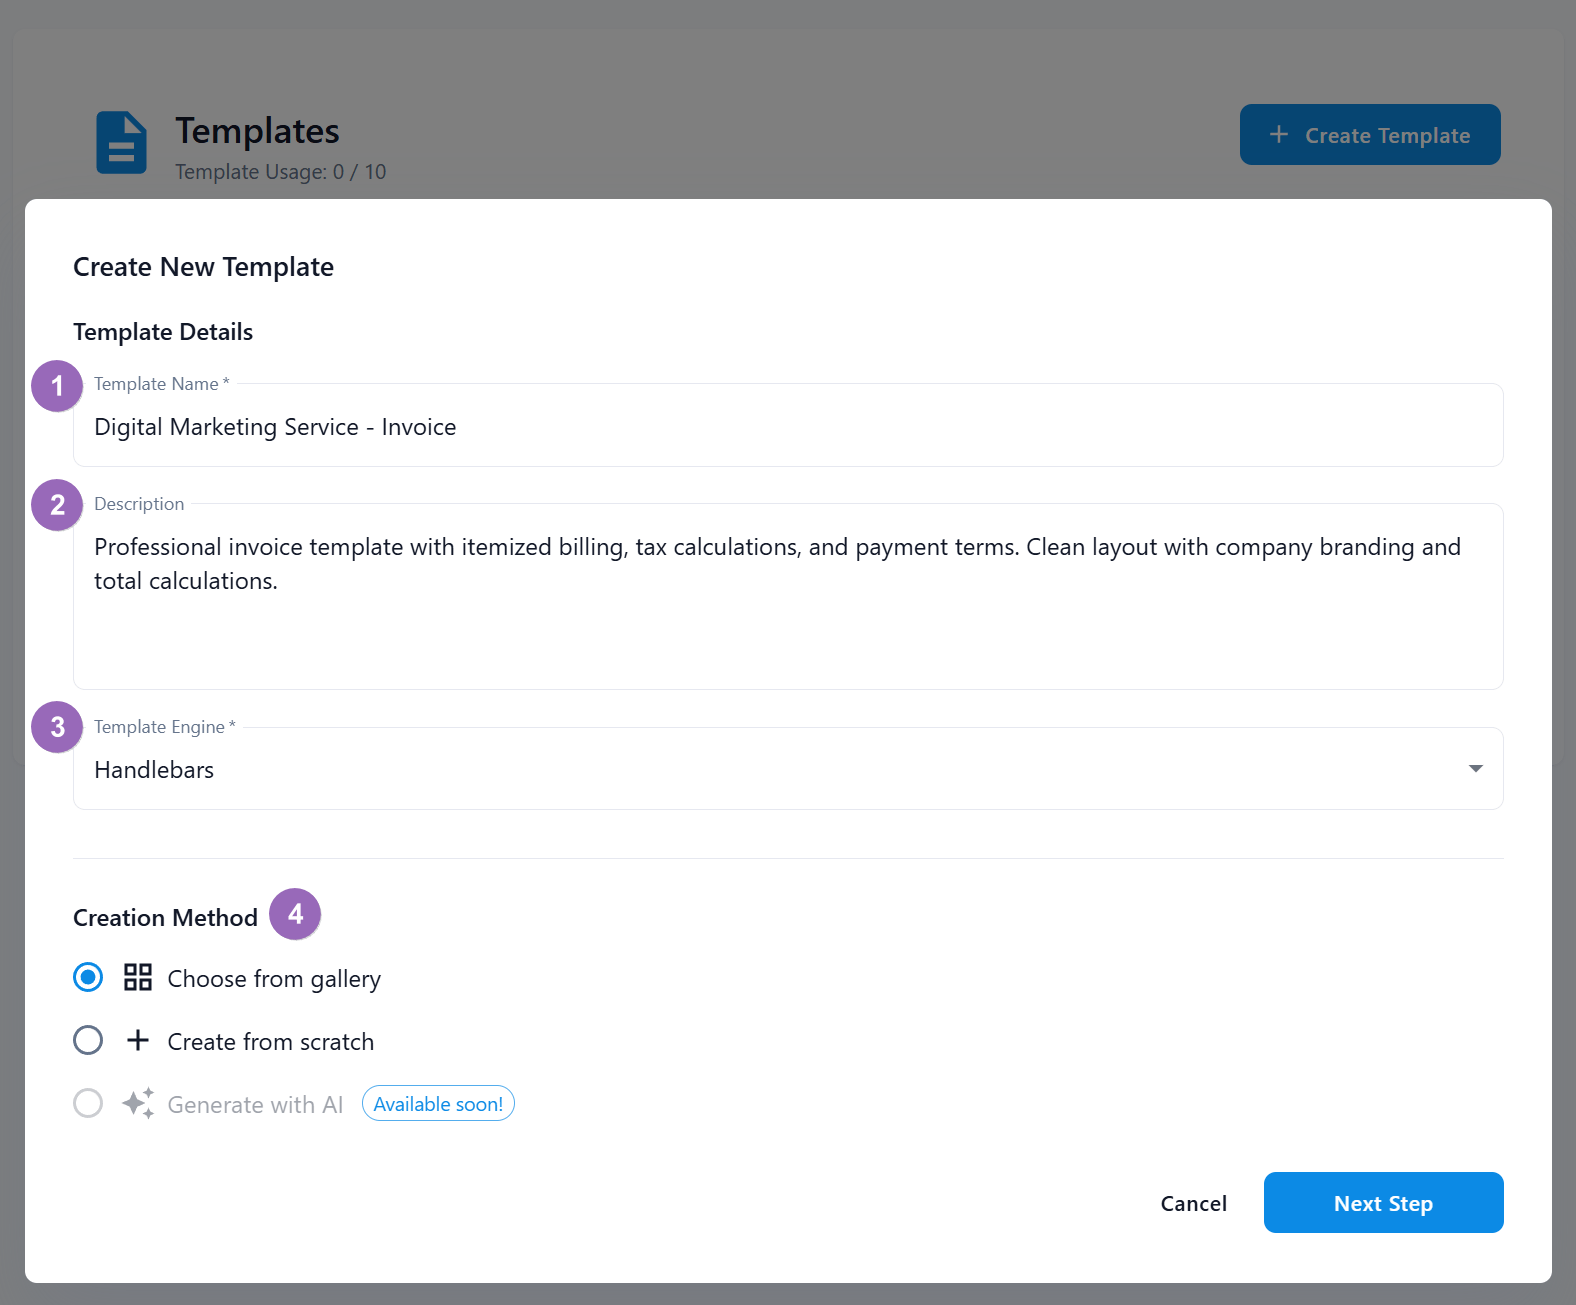
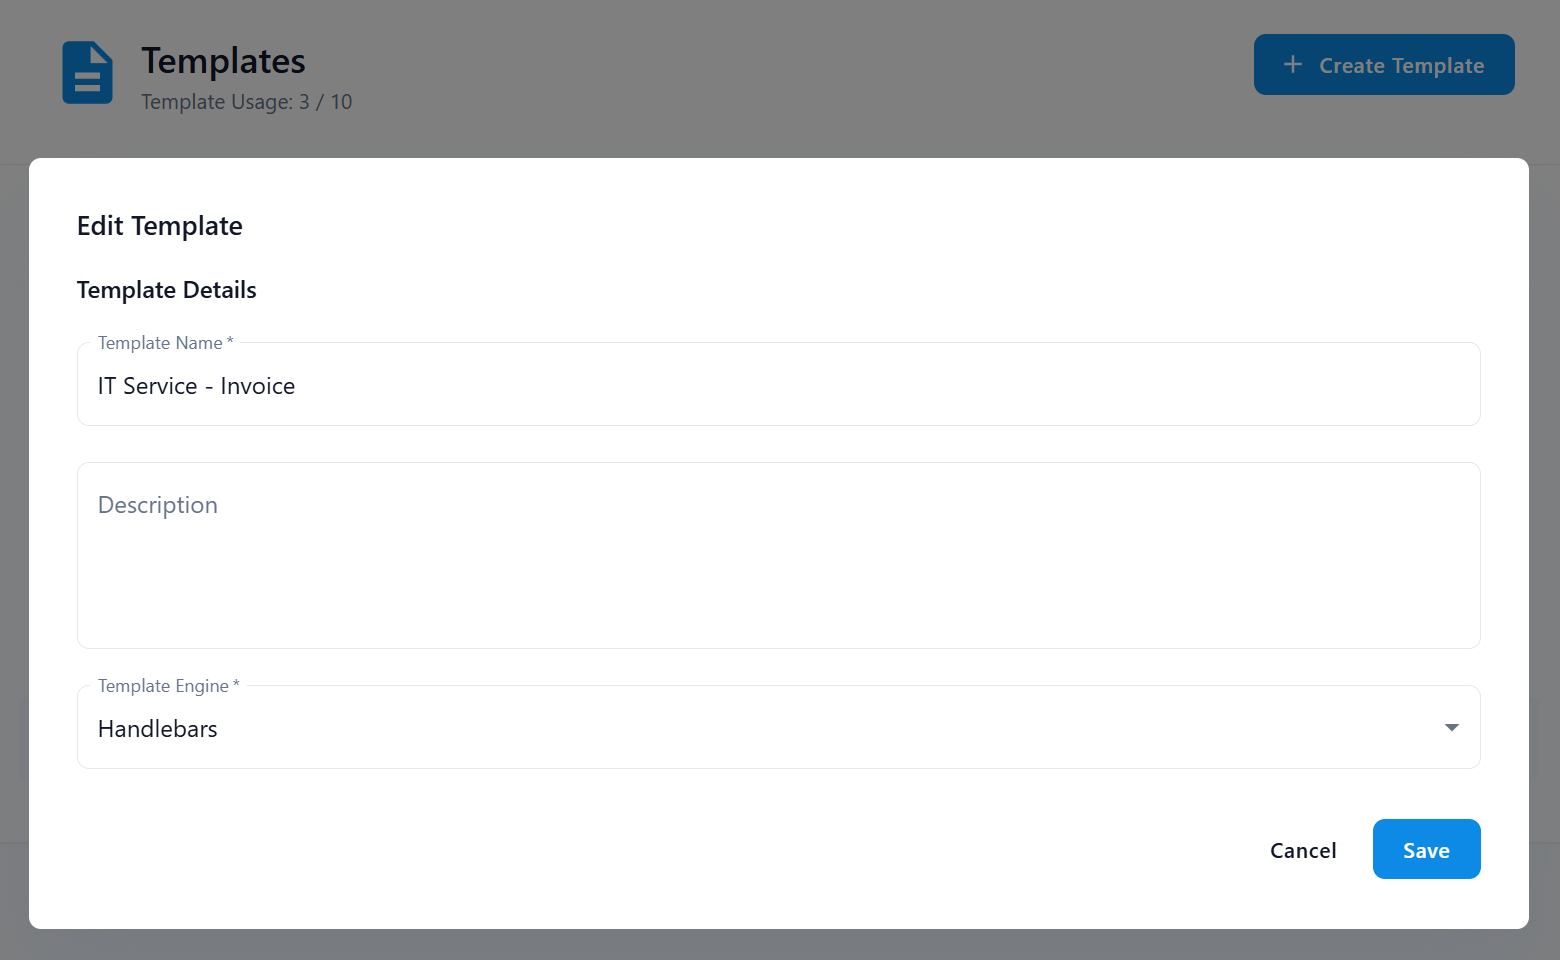
Fill in Template Details:
1
Template Name (required): Give your template a descriptive name.
2
Description (optional): Add details about the template's purpose or use case.
3
Template Engine: Currently set to "Handlebars" (additional engines coming soon).
4
Choose Your Creation Method:
Option 1: Choose from Gallery:
- Perfect for getting started quickly.
- Professional designs ready to customize.
- Covers common business needs: invoices, certificates, resumes, shipping labels.
Option 2: Create from Scratch:
- Full control over design.
- Start with blank HTML/CSS.
- Best for unique requirements.
Option 3: Generate with AI – Coming Soon
- AI-powered template generation.
- Describe your needs and get started.
Step 2: Template Gallery
If you choose "Choose from Gallery", you'll see the template gallery:

Select Your Template:
- Browse available templates by category.
- Click "Create Template" on your chosen design.
- You'll be taken directly to the Template Designer.
Step 3: Welcome to the Template Designer
After selecting a template (or creating from scratch), you'll enter the powerful template designer:
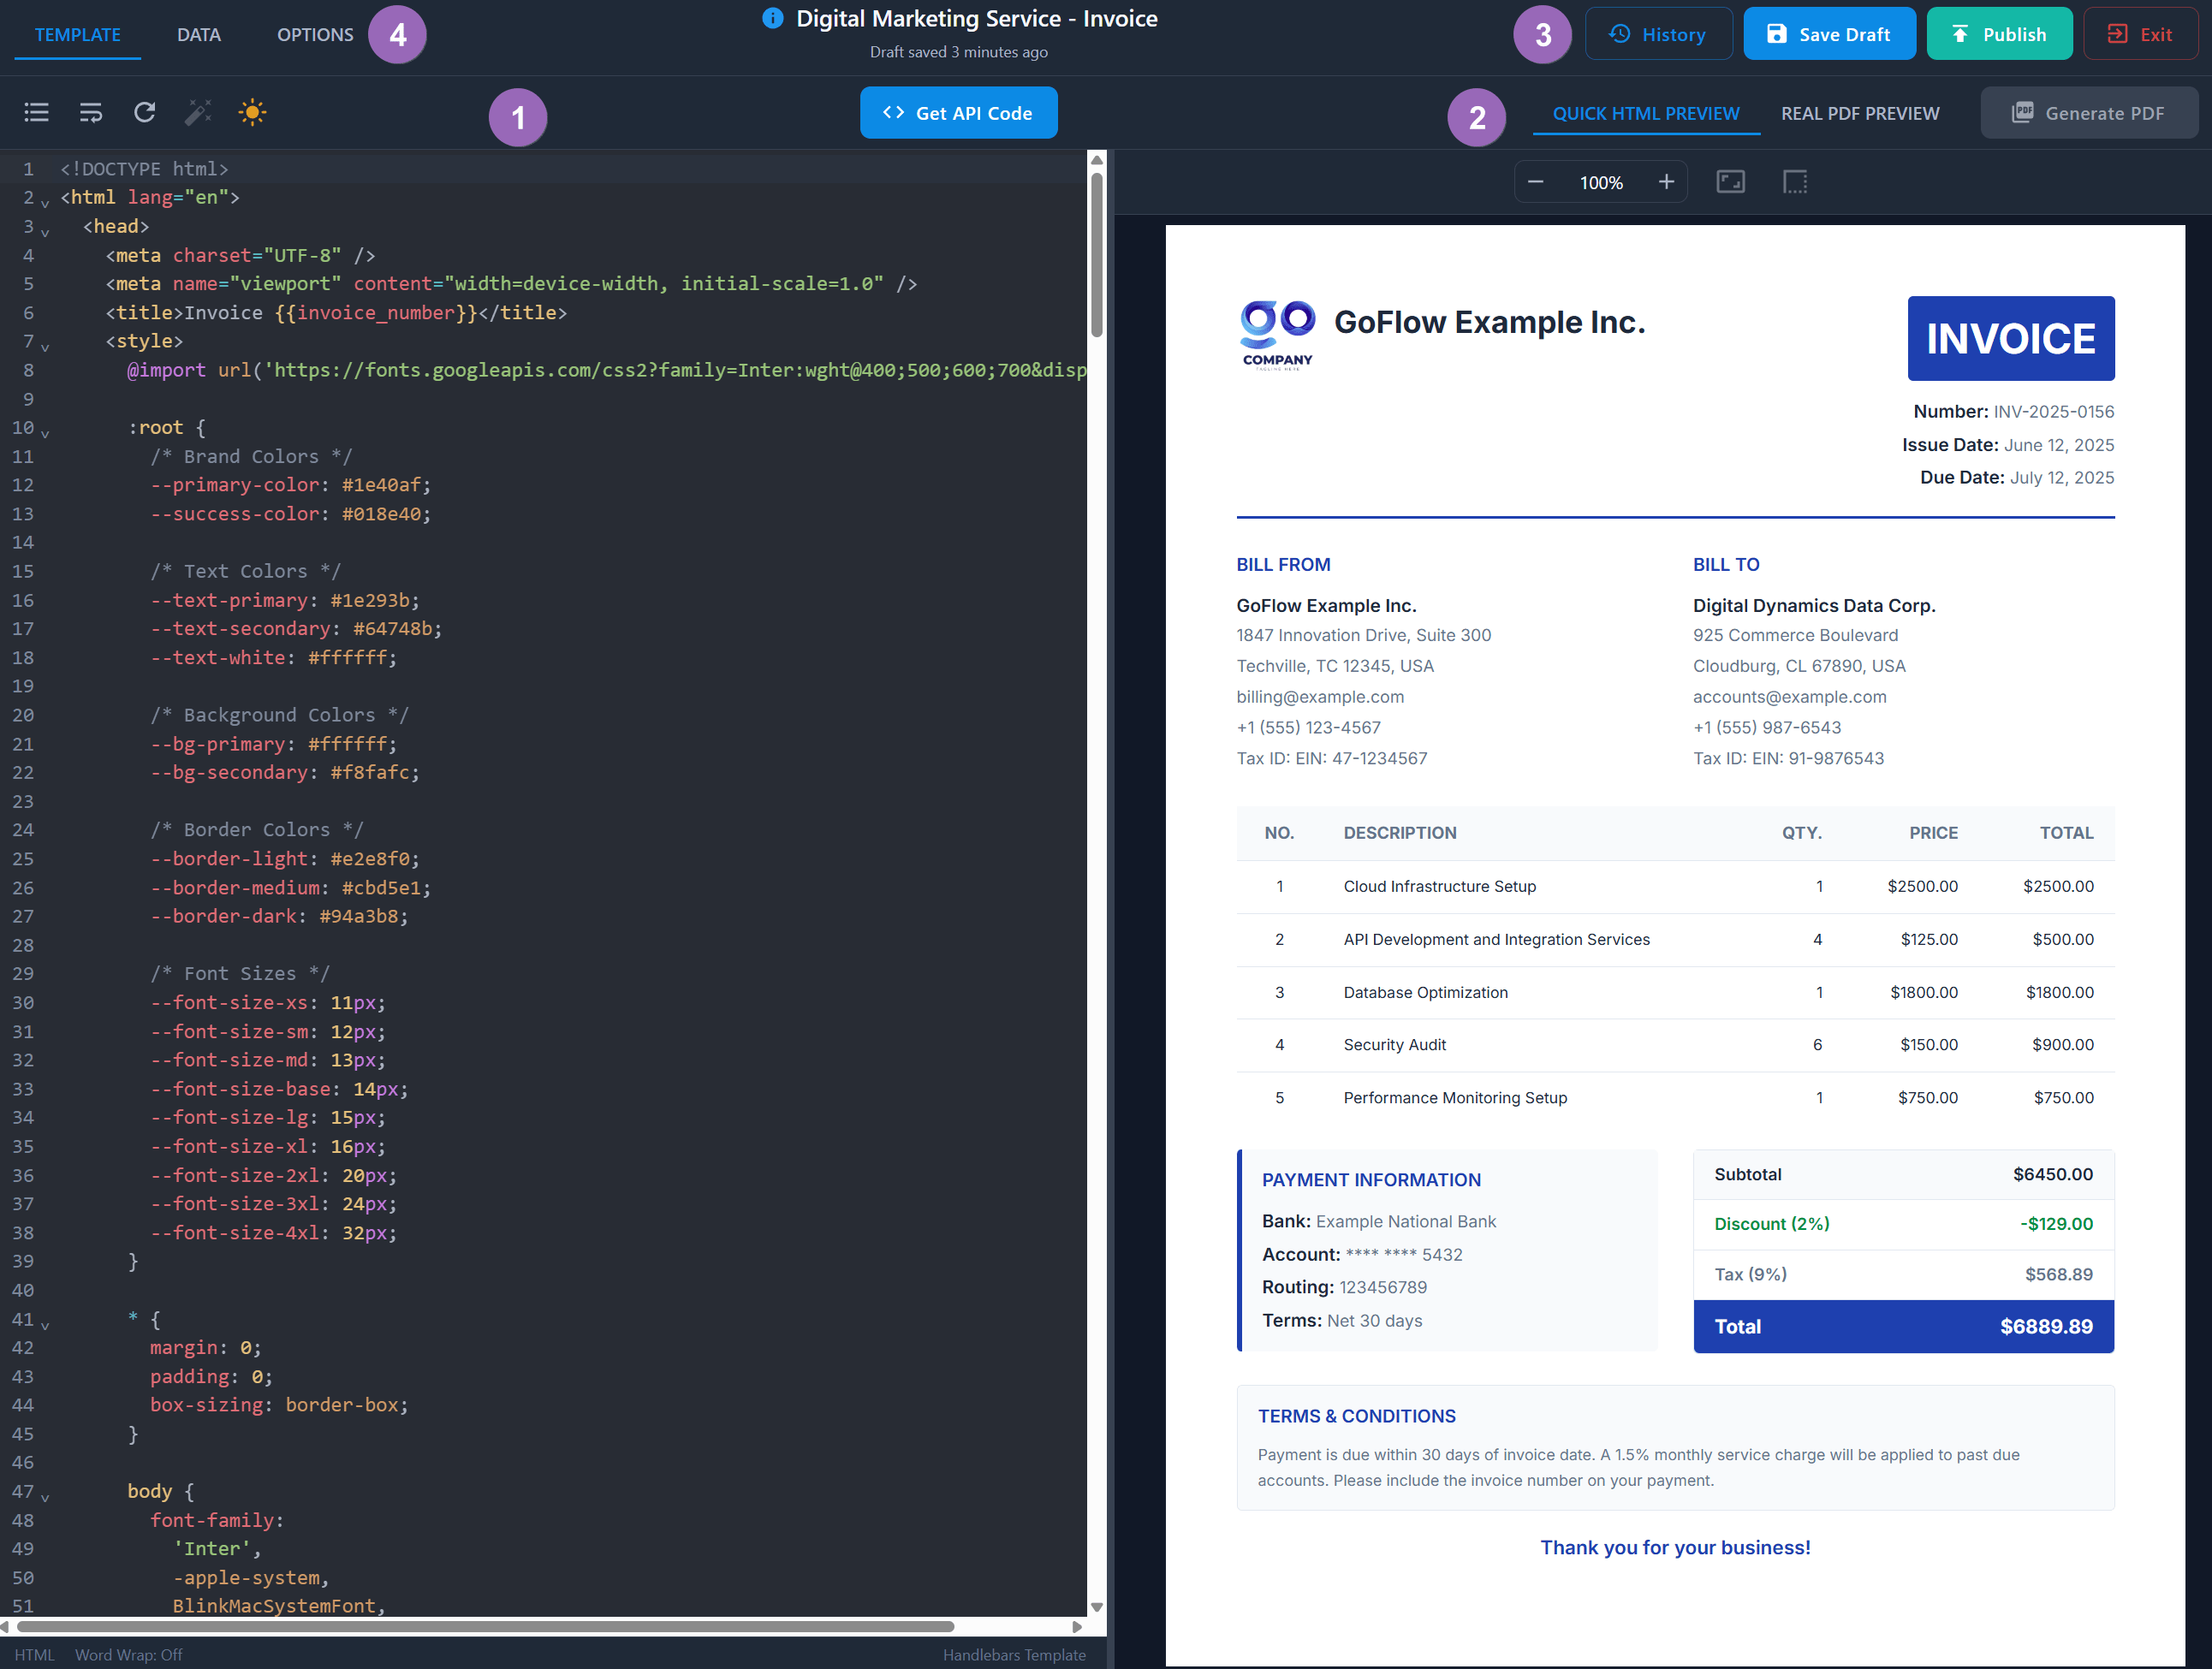
Designer Layout Overview:
1
Left Panel: Code editor with your HTML/CSS and Handlebars syntax.
2
Right Panel: Live preview of your template with the ability to generate real PDFs to see how they look.
Top Toolbar:
3
Actions: History | Save Draft | Publish | Exit
4
Tabs: Template code, sample data, and PDF options.
Step 4: Exploring the Designer Tabs
TEMPLATE Tab �– Your Code Editor
This is where you'll write your HTML/CSS code with Handlebars variables:
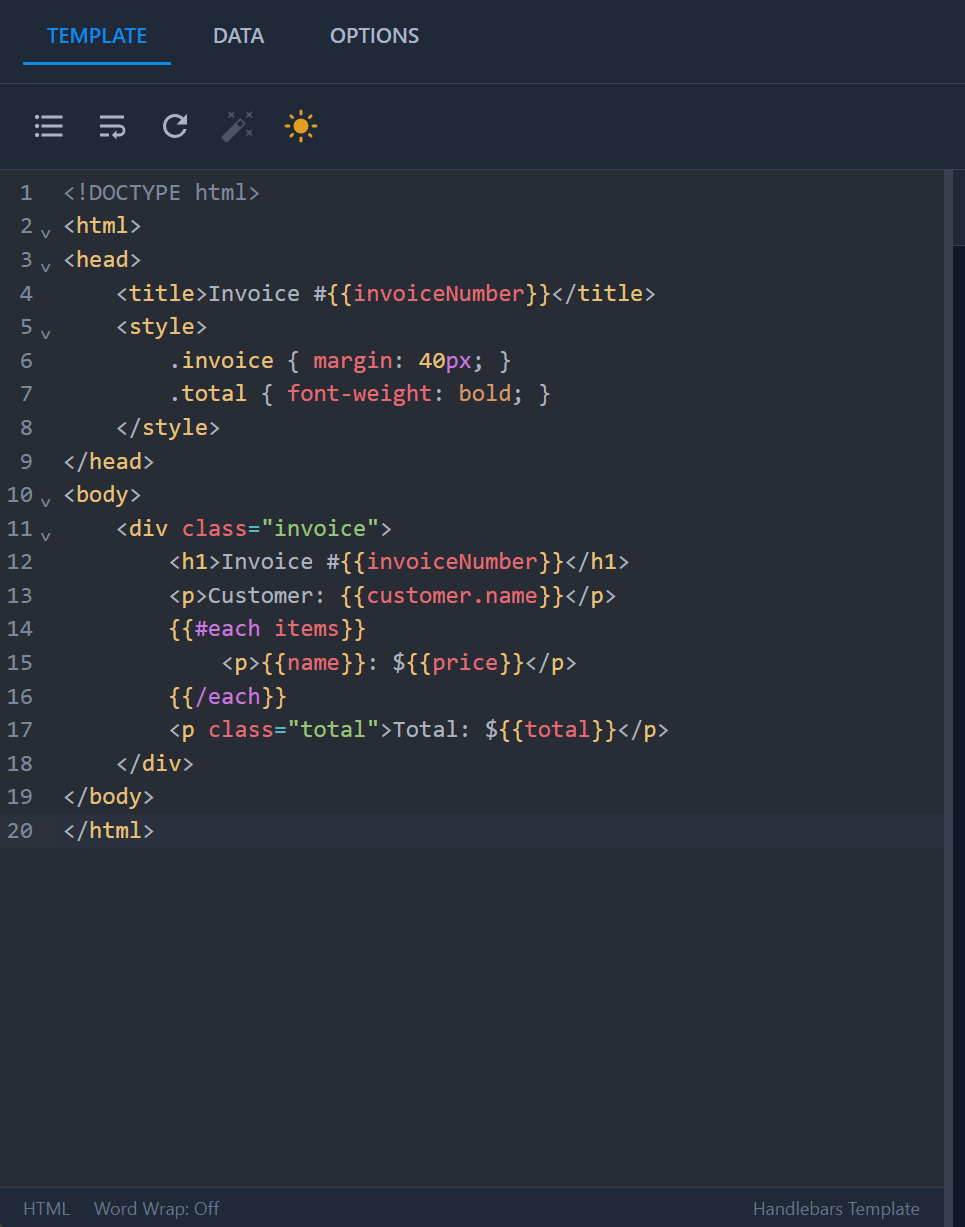
Key Features:
- Syntax highlighting for HTML, CSS, and Handlebars.
- Error Detection: Real-time syntax validation and error highlighting.
- Code editor options:
- Prettier ☰: Auto-format code with Prettier.
- Word Wrap ↩️: Toggle line wrapping for improved readability.
- Refresh 🔄: Manual preview refresh.
- AI Assist 🪄: AI-powered coding assistance for faster template creation (coming soon).
- Theme 🔆 | 🌙: Dark/Light mode toggle.

- Find & Replace (Ctrl+F): Search through your code with find and replace options.

DATA Tab
Switch to the DATA tab to provide sample JSON data:
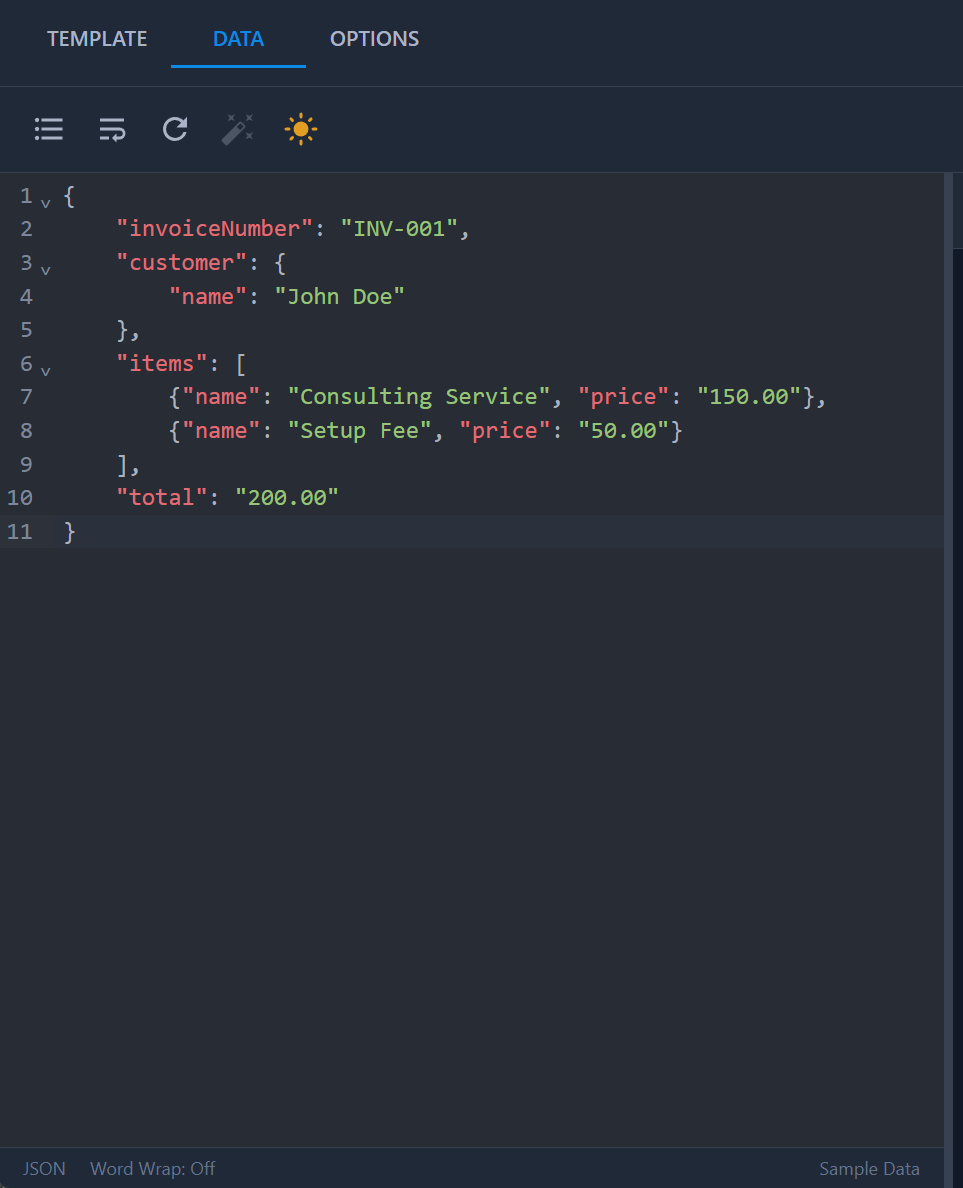
This data will populate your Handlebars variables in the quick preview and during real PDF generation, showing you exactly how your template will render with real data.
OPTIONS Tab
Configure PDF Options
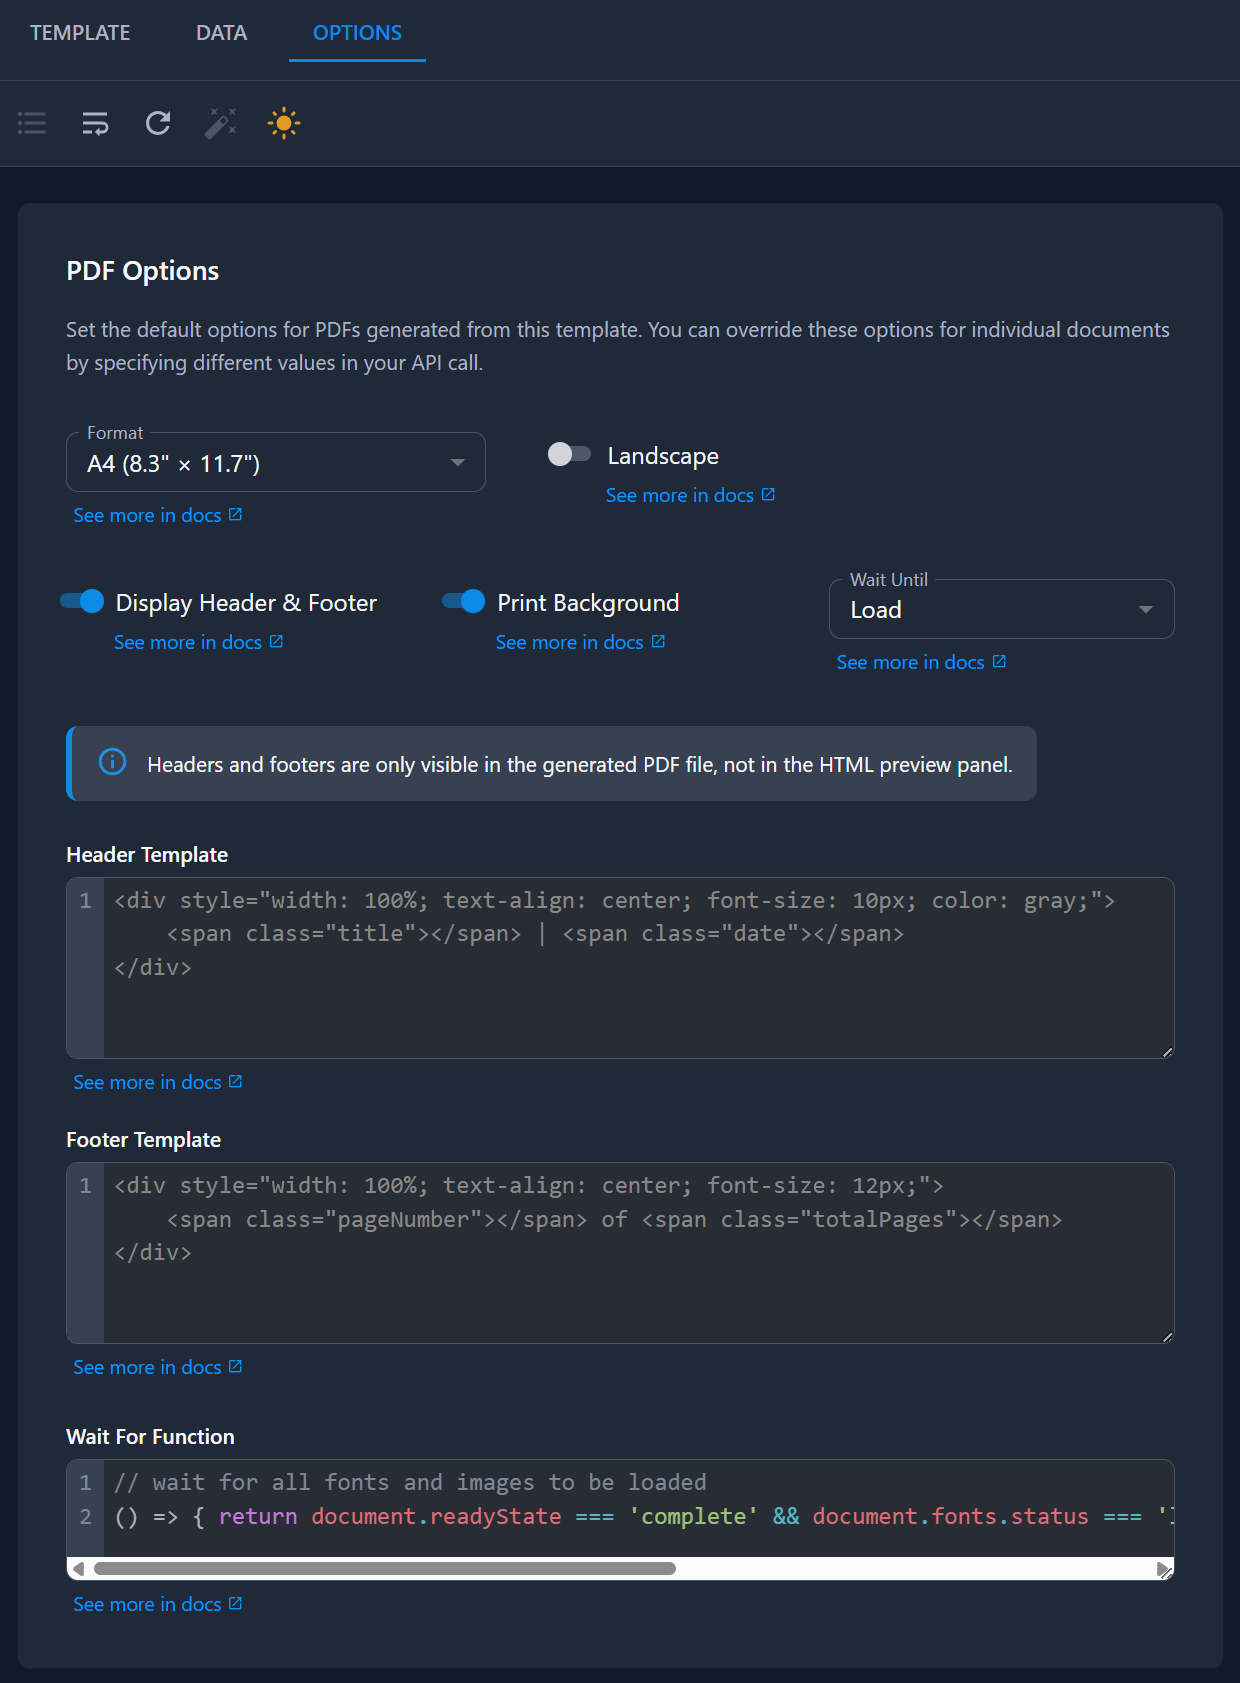
PDF Generation Options:
- Format: Choose from A4, Letter, Legal, and more.
- Orientation: Portrait or Landscape.
- Display Header & Footer: Add page headers/footers.
- Print Background: Include background colors and images.
- Wait Until: Choose when page is considered fully loaded (domcontentloaded, load, networkidle, commit).
- Wait For Function: JavaScript function to wait until content loads completely (you can write your own custom function).
Set Designer Options
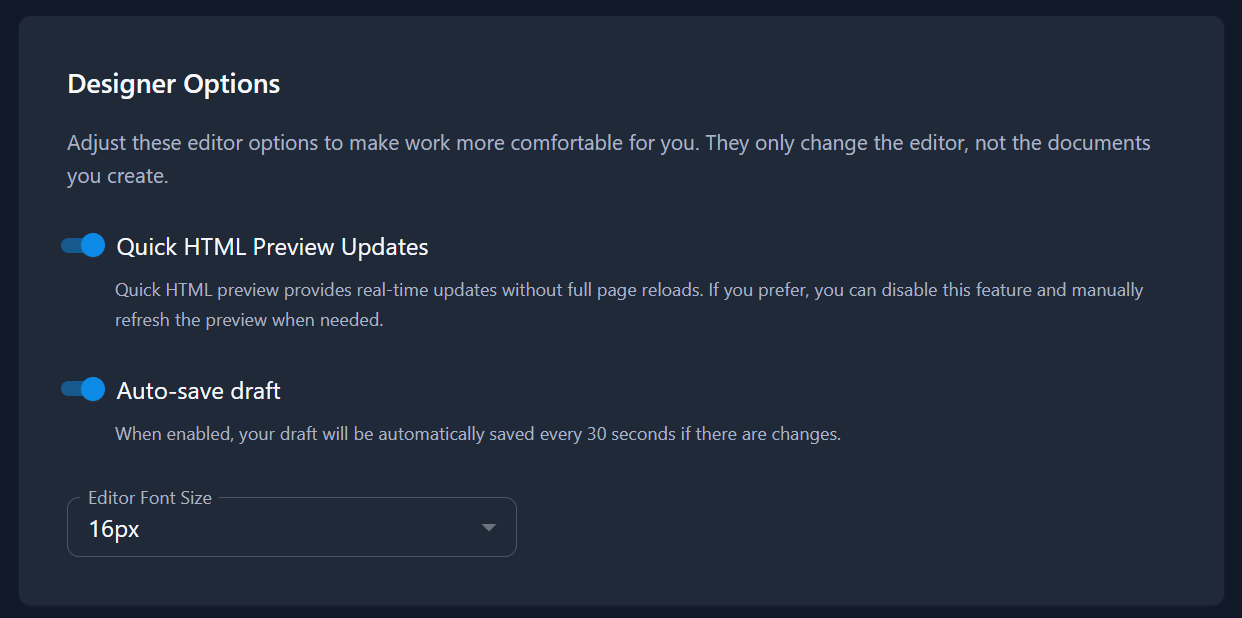
Designer Options:
- Quick HTML Preview Updates: Toggle real-time preview refresh without full page reloads (can be disabled for manual refresh).
- Auto-save Draft: Automatically save your template every 30 seconds when changes are detected.
- Editor Font Size: Customize code editor font size for better readability.
Step 5: Preview Your Template
Quick HTML Preview (Default)
The default preview mode provides instant visual feedback during template development without full PDF generation:
- Real-time updates as you edit (when enabled).
- Zoom controls: +/- buttons, fit to width, fit to page.
- Page breaks: Toggle to see print layout divisions.
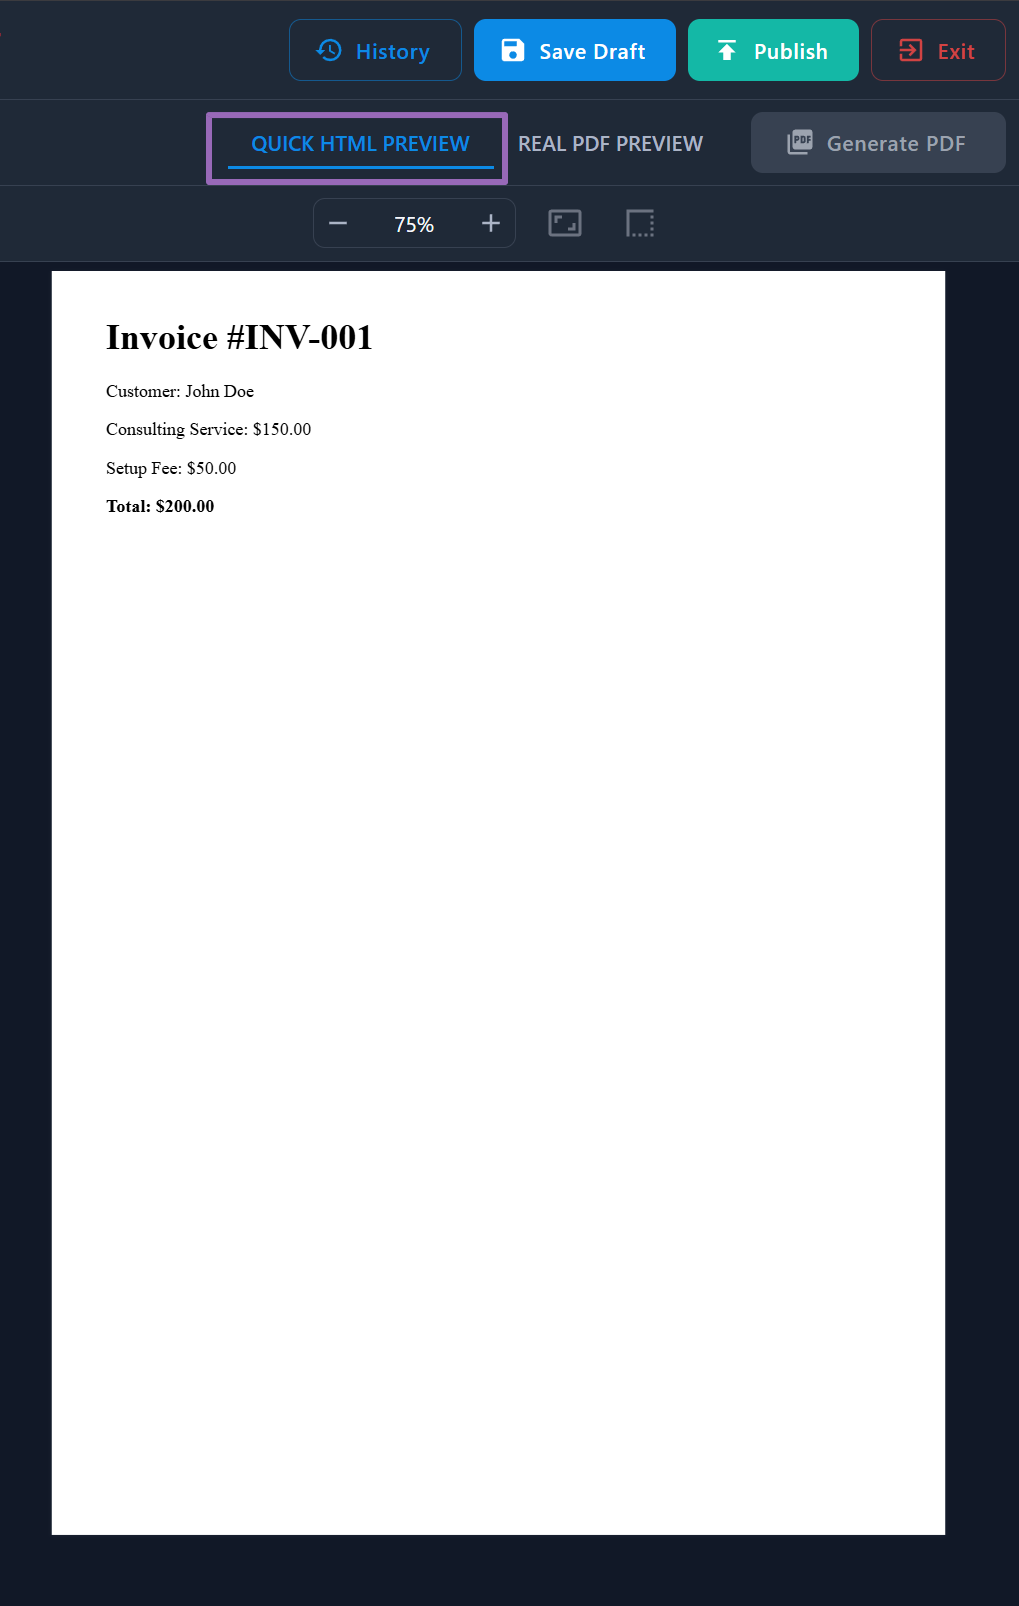
Real PDF Preview – The Real Test
- Click the "REAL PDF PREVIEW" tab.
- Click "Generate PDF" button.
- Wait for processing (usually a few seconds).
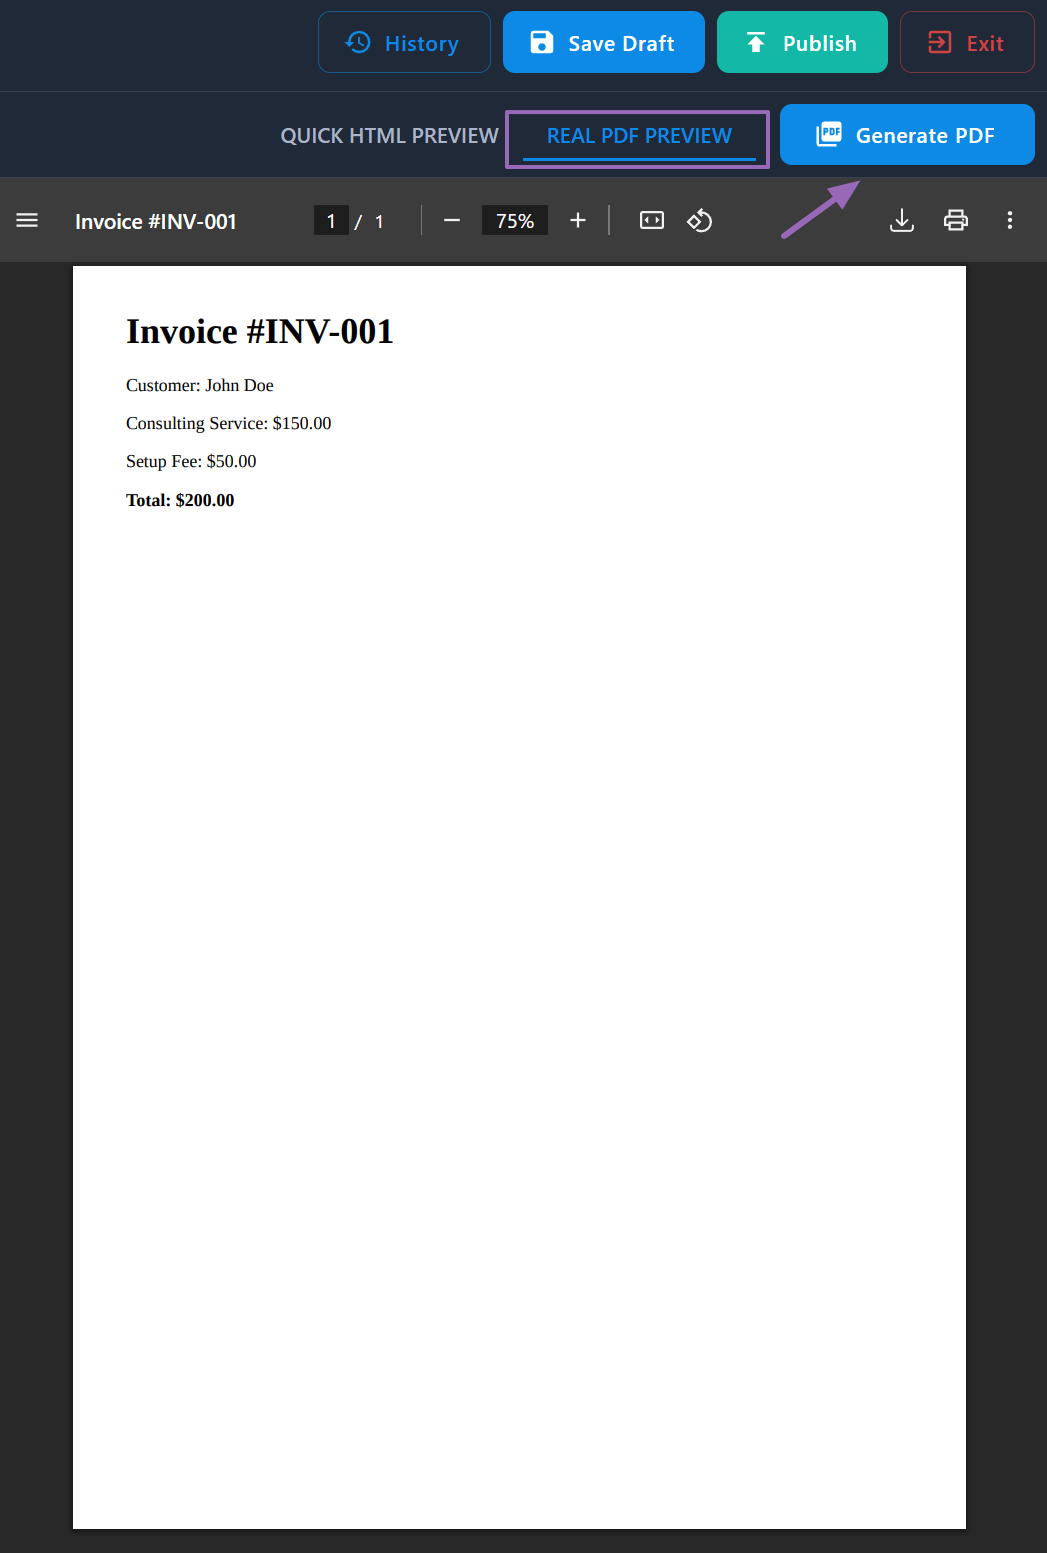
Why use Real PDF Preview:
- See exactly what the API will generate.
- Test complex layouts and styling.
- Verify page breaks and formatting.
- Ensure all fonts and images load correctly.
- Preview print-specific styles like
@media printCSS rules if added. - Check header/footer rendering if configured in PDF Options.
Step 6: Save Your Work
Your template automatically saves every 30 seconds (if not disabled in Designer Options). You can also manually save by clicking "Save Draft" anytime. It creates a draft version you can continue editing.

Step 7: Publish Your Template
When you're satisfied with your template, it's time to make it available via API:
- Click the "Publish" button.
- Add a version comment (optional).
- Click "Publish" to confirm.
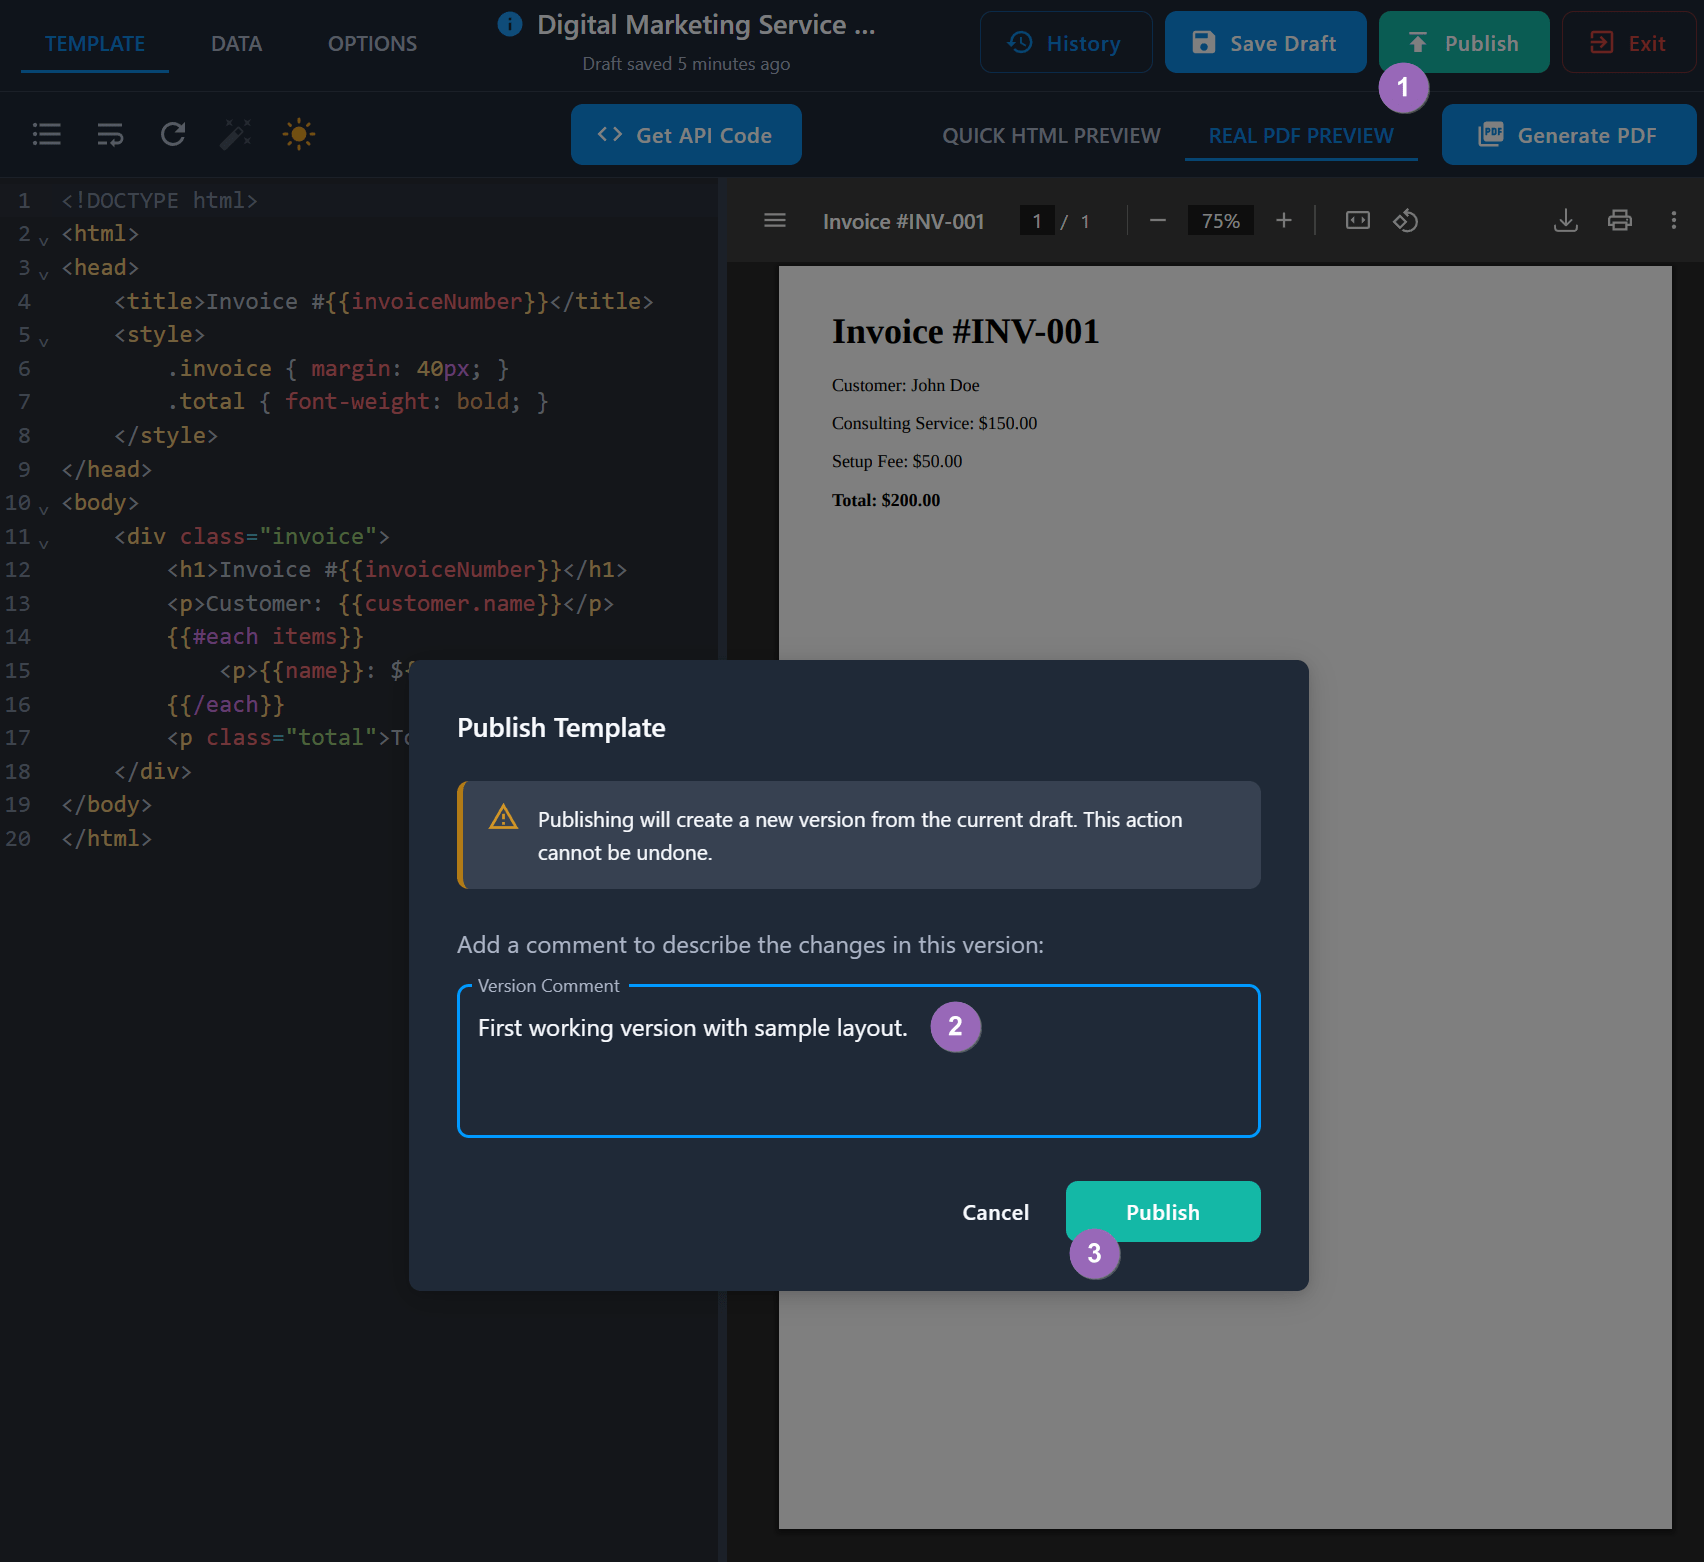
What happens when you publish:
- Creates version v1 of your template (subsequent versions will be v2, v3, etc.).
- Template becomes available via API immediately.
- You can use a unique template ID for API calls.
- You can continue editing (creates new draft for next version).
Template must be published before you can use it for PDF generation. Draft versions cannot be accessed through API calls.
Step 8: Get Your API Integration Code
Click "Get API Code" to access ready-to-use integration examples:
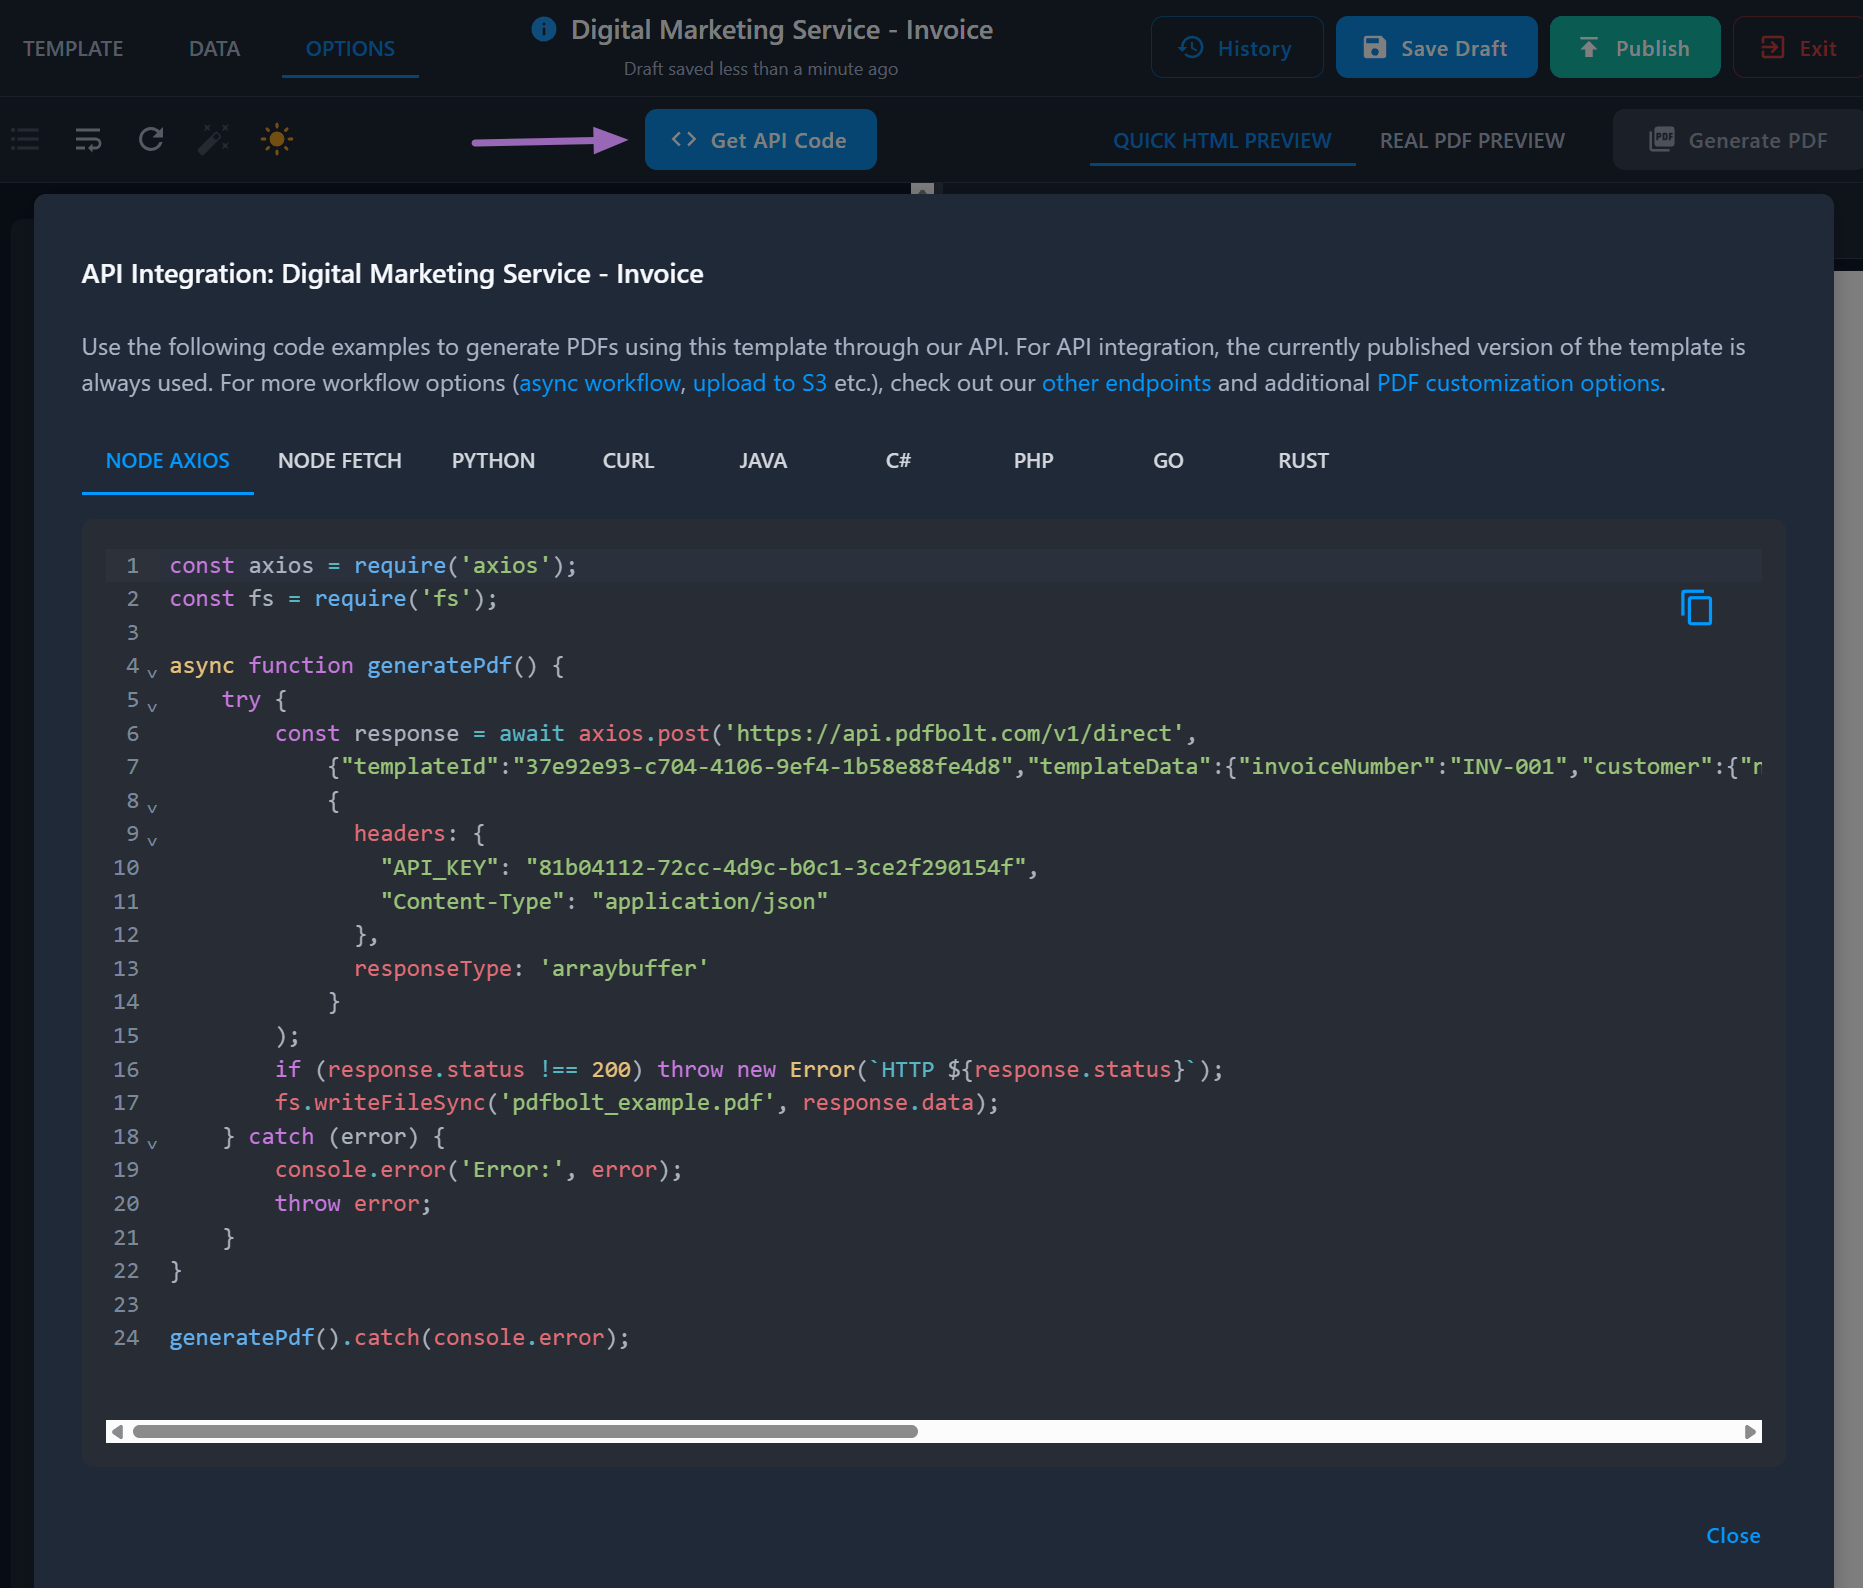
Code snippets available in multiple languages:
- Node.js (Axios and Fetch variants)
- Python
- cURL
- Java
- C#
- PHP
- Go
- Rust
Copy a code example and test it in your application.
Success! You've now created your first template and can generate PDFs.
Managing Your Templates
Once you have templates, your dashboard will look like this:
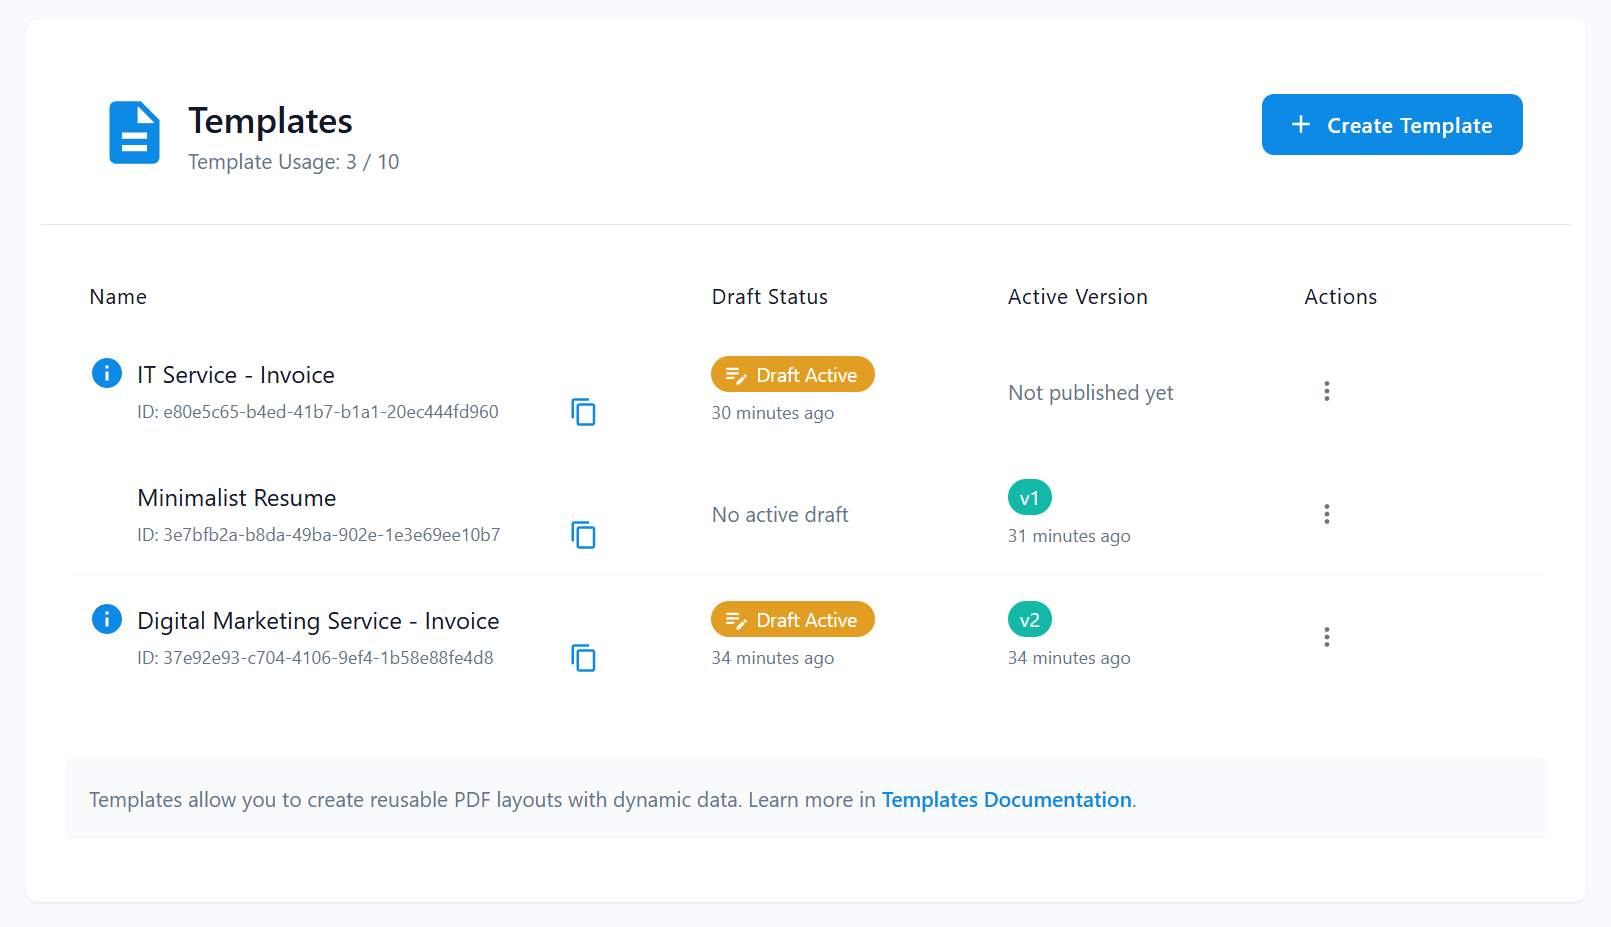
Template List Overview
Each template shows:
| No. | Column | Description |
|---|---|---|
| 1️⃣ | Name | Template name with unique ID |
| 2️⃣ | Draft Status | Current draft status and last modification |
| 3️⃣ | Active Version | Published version available via API |
| 4️⃣ | Actions | Management options menu |
Template Status Indicators
- Draft Active (Orange): Has unpublished changes.
- Version Badge (Green): Published version (v1, v2, etc.).
- "Not published yet": Created but never published.
- "No active draft": Published with no pending changes.
Template Actions Menu
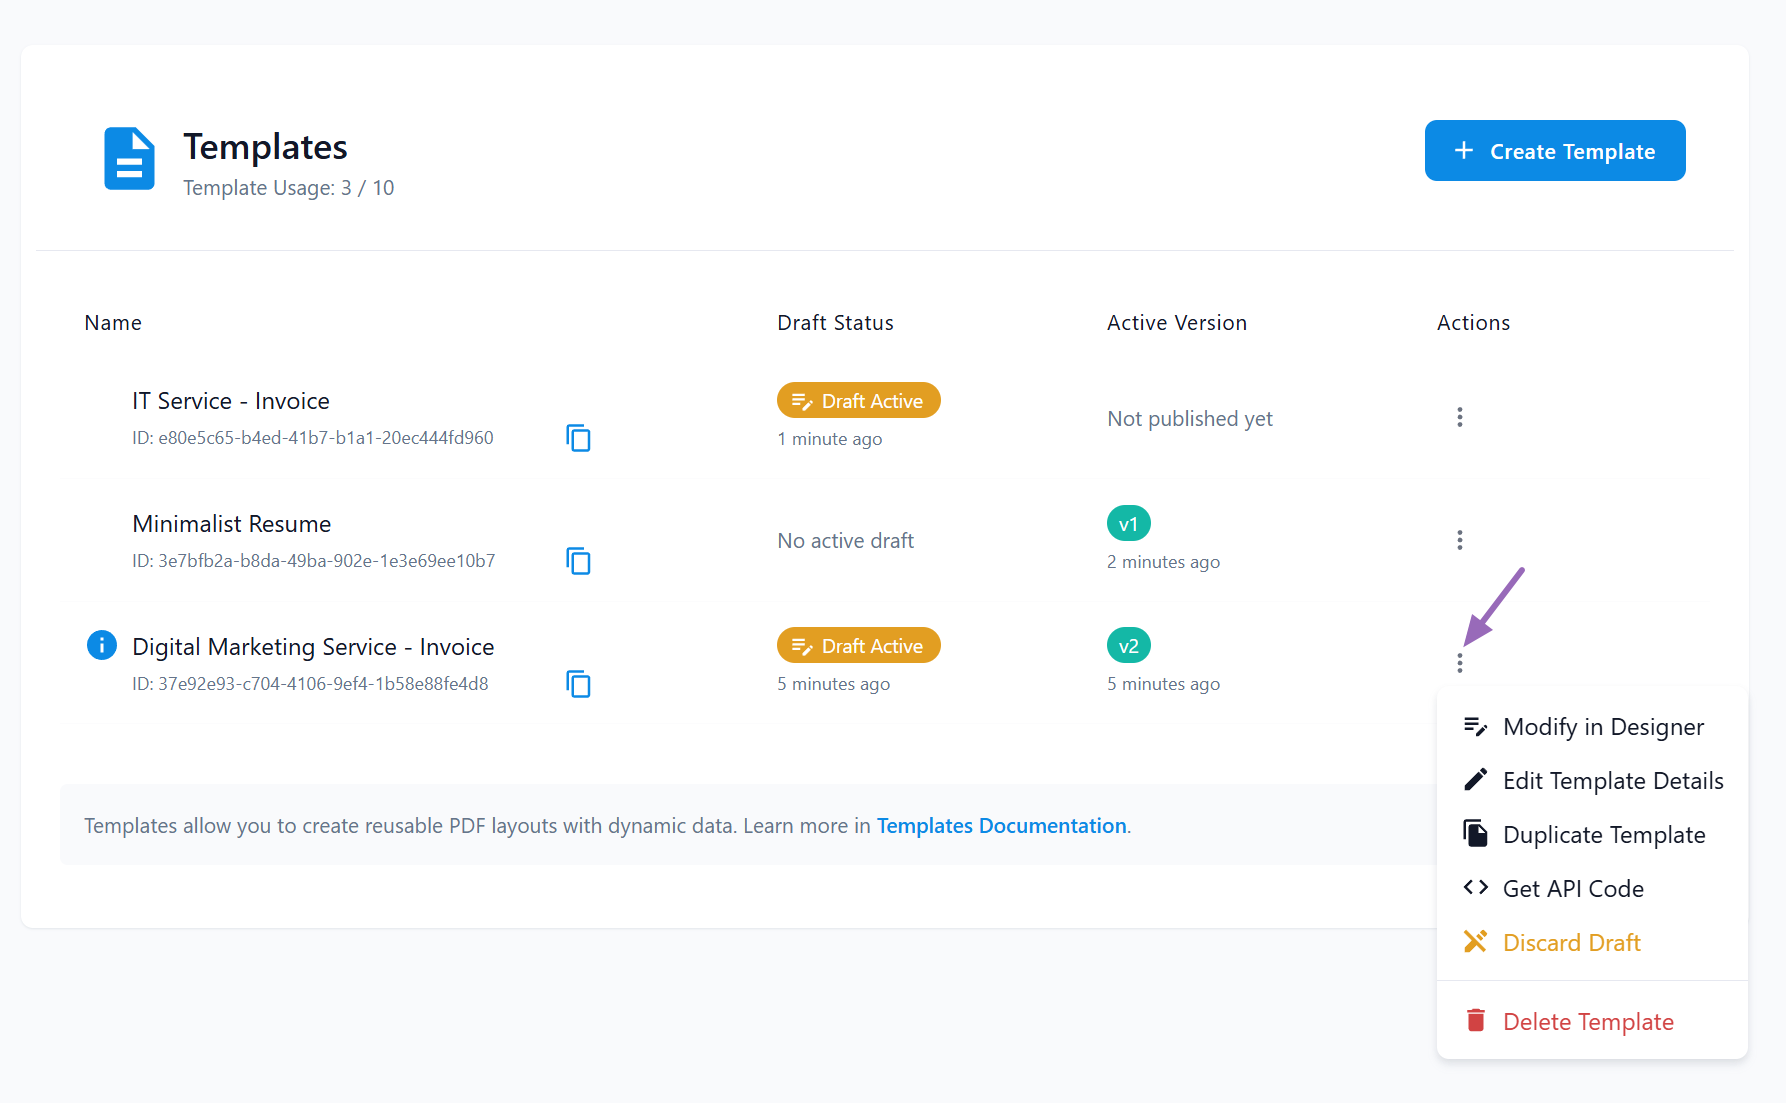
Click the three dots (⋮) next to any template for these options:
- Modify in Designer: Open template in code editor.
- Edit Template Details: Change name or description.
- Duplicate Template: Create a copy for variations.

-
Get API Code: Access ready-to-use integration examples (same as clicking "Get API Code" button in designer).
-
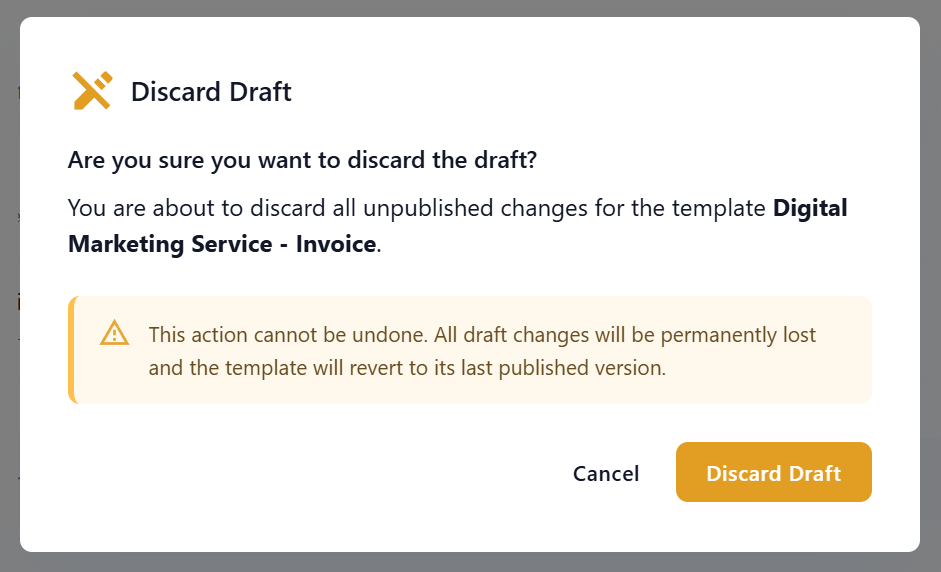
Discard Draft: Remove unpublished changes and revert to published version (if active draft exists).
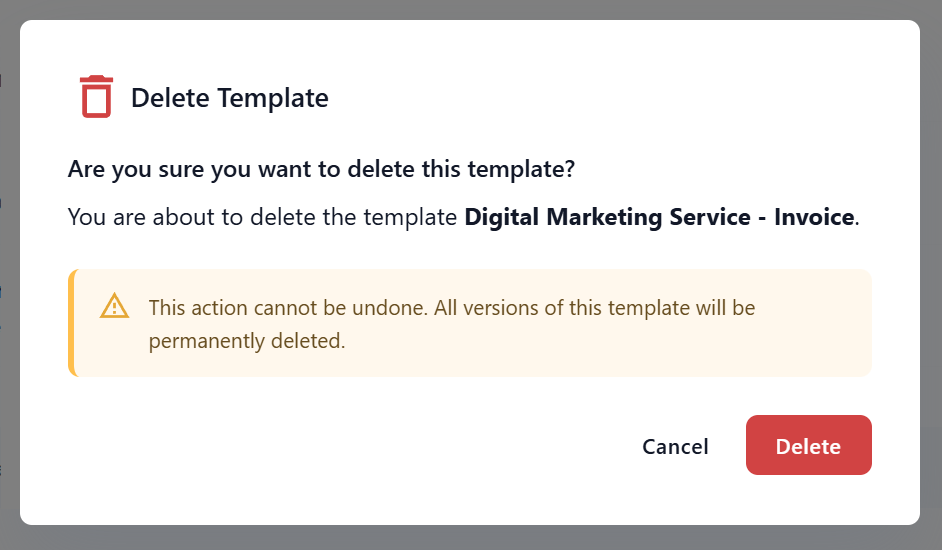
- Delete Template: Permanently remove template.
Working with Template Versions
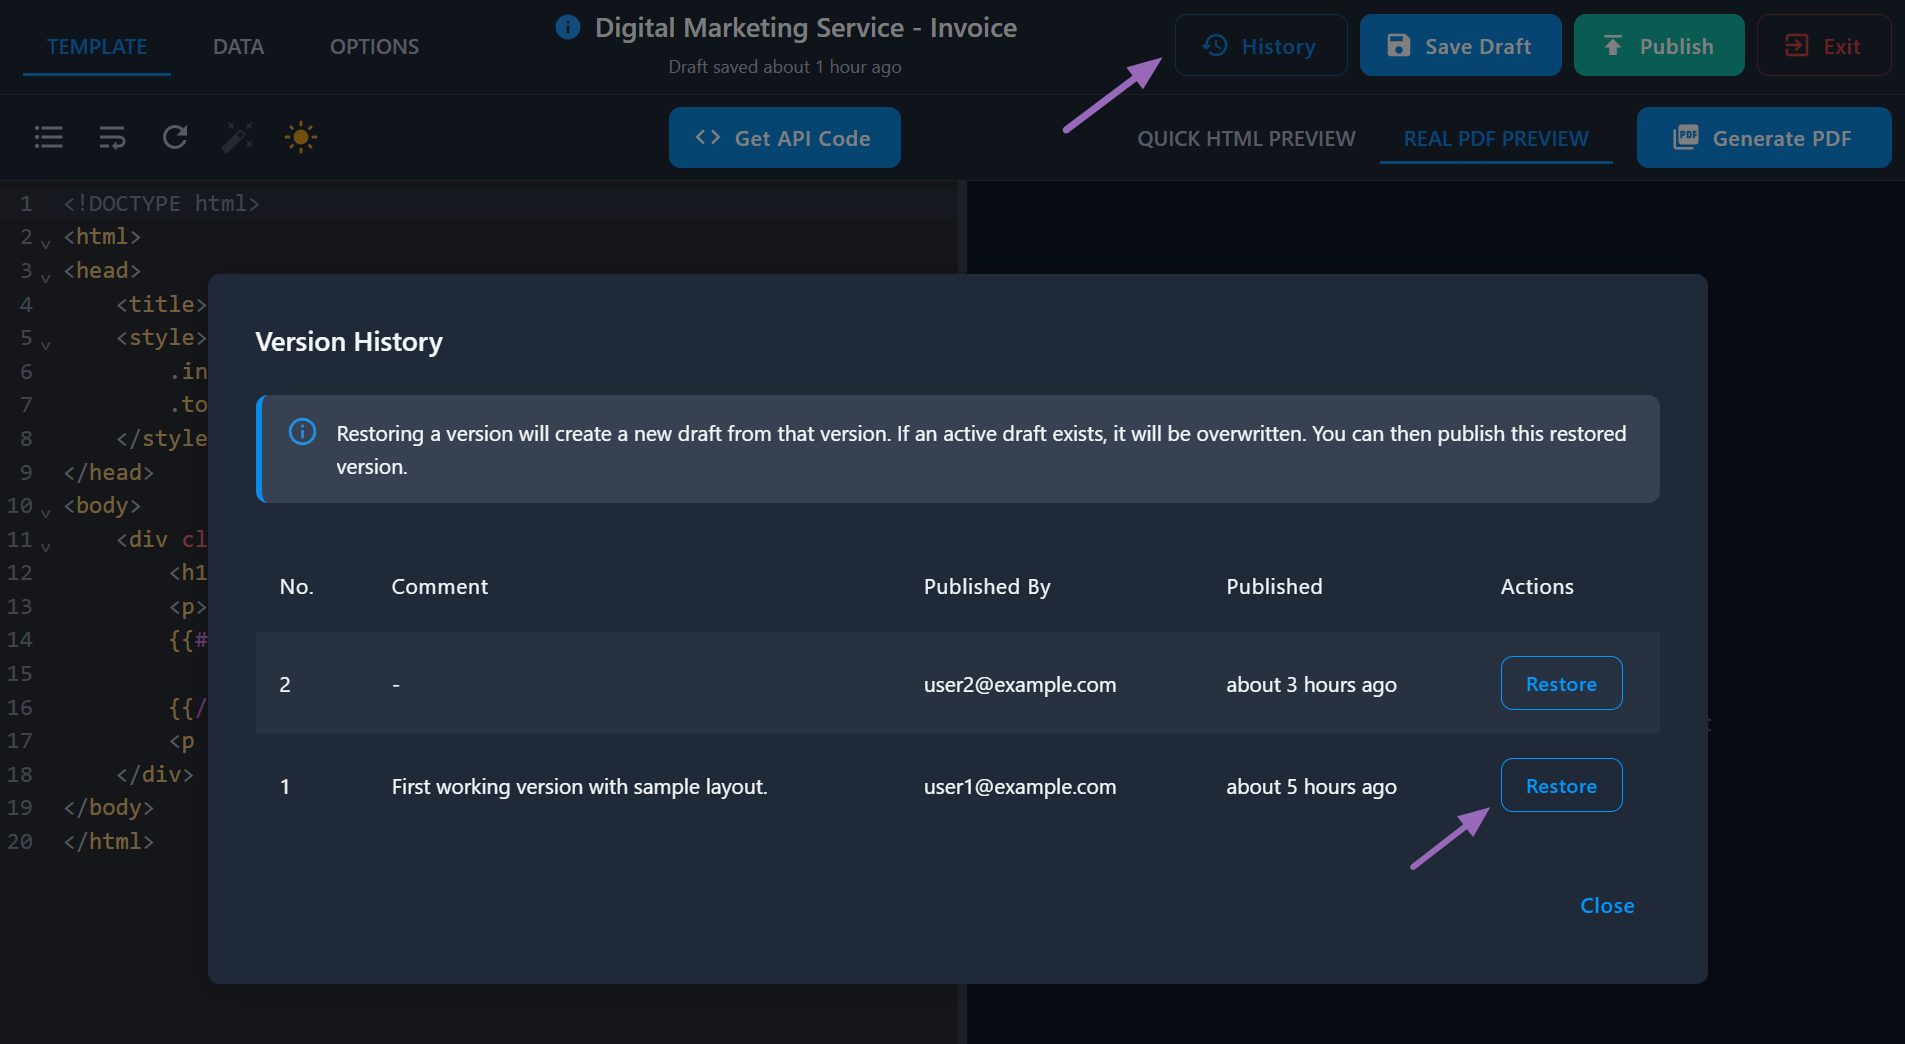
Access Version History:
- Click "History" button in the template designer.
- See who published each version and when.
- Read version comments explaining changes (if added).
Restore Previous Versions:
- Click "Restore" next to any version.
- Creates a new draft from that version.
- Make any additional changes needed.
- Publish as a new version.
Helpful Links
- Templates Guide – Templates overview, benefits, and use cases.
- Quick Start – Integration examples and code snippets.
- Template Parameters –
templateId,templateData, and PDF options reference. - API Endpoints – All available endpoints.
- Handlebars Docs – Official templating syntax guide.
- Support – Get help from our team.